For quite a while now, the CSS spec has included a lot of really useful mathematical functions, such as trigonometric functions (sin(), cos(), tan(), asin(), acos(), atan(), atan2()), exponential functions (pow(), exp(), sqrt(), log(), hypot()), sign-related functions (abs(), sign()) and stepped value functions (round(), mod(), rem()).
However, these are not yet implemented in any browser, so this article is going to show how, using CSS features we already have, we can compute the values that abs(), sign(), round() and mod() should return. And then we’ll see what cool things this allows us to build today.

Note that none of these techniques were ever meant to work in browsers from back in the days when dinosaurs roamed the internet. Some of them even depend on the browser supporting the ability to register custom properties (using @property), which means they’re limited to Chromium for now.
The computed equivalents
--abs
We can get this by using the new CSS max() function, which is already implemented in the current versions of all major browsers.
Let’s say we have a custom property, --a. We don’t know whether this is positive or negative and we want to get its absolute value. We do this by picking the maximum between this value and its additive inverse:
--abs: max(var(--a), -1*var(--a));If --a is positive, this means it’s greater than zero, and multiplying it with -1 gives us a negative number, which is always smaller than zero. That, in turn, is always smaller than the positive --a, so the result returned by max() is equal to var(--a).
If --a is negative, this means it’s smaller than zero, and that multiplying it by -1 gives us a positive number, which is always bigger than zero, which, in turn, is always bigger than the negative --a. So, the result returned by max() is equal to -1*var(--a).
--sign
This is something we can get using the previous section as the sign of a number is that number divided by its absolute value:
--abs: max(var(--a), -1*var(--a));
--sign: calc(var(--a)/var(--abs));
A very important thing to note here is that this only works if --a is unitless, as we cannot divide by a number with a unit inside calc().
Also, if --a is 0, this solution works only if we register --sign (this is only supported in Chromium browsers at this point) with an initial-value of 0:
@property --sign {
  syntax: '<integer>';
  initial-value: 0;
  inherits: false /* or true depending on context */
}
This is because --a, being 0, also makes --abs compute to 0 — and dividing by 0 is invalid in CSS calc() — so we need to make sure --sign gets reset to 0 in this situation. Keep in mind that this does not happen if we simply set it to 0 in the CSS prior to setting it to the calc() value and we don’t register it:
--abs: max(var(--a), -1*var(--a));
--sign: 0; /* doesn't help */
--sign: calc(var(--a)/var(--abs));
In practice, I’ve also often used the following version for integers:
--sign: clamp(-1, var(--a), 1);Here, we’re using a clamp() function. This takes three arguments: a minimum allowed value -1, a preferred value var(--a) and a maximum allowed value, 1. The value returned is the preferred value as long as it’s between the lower and upper bounds and the limit that gets exceeded otherwise.
If --a is a negative integer, this means it’s smaller or equal to -1, the lower bound (or the minimum allowed value) of our clamp() function, so the value returned is -1. If it’s a positive integer, this means it’s greater or equal to 1, the upper bound (or the maximum allowed value) of the clamp() function, so the value returned is 1. And finally, if --a is 0, it’s between the lower and upper limits, so the function returns its value (0 in this case).
This method has the advantage of being simpler without requiring Houdini support. That said, note that it only works for unitless values (comparing a length or an angle value with integers like ±1 is like comparing apples and oranges — it doesn’t work!) that are either exactly 0 or at least as big as 1 in absolute value. For a subunitary value, like -.05, our method above fails, as the value returned is -.05, not -1!
My first thought was that we can extend this technique to subunitary values by introducing a limit value that’s smaller than the smallest non-zero value we know --a can possibly take. For example, let’s say our limit is .000001 — this would allow us to correctly get -1 as the sign for -.05, and 1 as the sign for .0001!
--lim: .000001;
--sign: clamp(-1*var(--lim), var(--a), var(--lim));
Temani Afif suggested a simpler version that would multiply --a by a very large number in order to produce a superunitary value.
--sign: clamp(-1, var(--a)*10000, 1);I eventually settled on dividing --a by the limit value because it just feels a bit more intuitive to see what minimum non-zero value it won’t go below.
--lim: .000001;
--sign: clamp(-1, var(--a)/var(--lim), 1);
--round (as well as --ceil and --floor)
This is one I was stuck on for a while until I got a clever suggestion for a similar problem from Christian Schaefer. Just like the case of the sign, this only works on unitless values and requires registering the --round variable as an <integer> so that we force rounding on whatever value we set it to:
@property --round {
  syntax: '<integer>';
  initial-value: 0;
  inherits: false /* or true depending on context */
}

.my-elem { --round: var(--a); }
By extension, we can get --floor and --ceil if we subtract or add .5:
@property --floor {
  syntax: '<integer>';
  initial-value: 0;
  inherits: false /* or true depending on context */
}

@property --ceil {
  syntax: '<integer>';
  initial-value: 0;
  inherits: false /* or true depending on context */
}

.my-elem {
  --floor: calc(var(--a) - .5);
  --ceil: calc(var(--a) + .5)
}
--mod
This builds on the --floor technique in order to get an integer quotient, which then allows us to get the modulo value. This means that both our values must be unitless.
@property --floor {
  syntax: '<integer>';
  initial-value: 0;
  inherits: false /* or true depending on context */
}

.my-elem {
  --floor: calc(var(--a)/var(--b) - .5);
  --mod: calc(var(--a) - var(--b)*var(--floor))
}
Use cases
What sort of things can we do with the technique? Let’s take a good look at three use cases.
Effortless symmetry in staggered animations (and not only!)
While the absolute value can help us get symmetrical results for a lot of properties, animation-delay and transition-delay are the ones where I’ve been using it the most, so let’s see some examples of that!
We put --n items within a container, each of these items having an index --i. Both --n and --i are variables we pass to the CSS via style attributes.
- let n = 16;

.wrap(style=`--n: ${n}`)
  - for(let i = 0; i < n; i++)
    .item(style=`--i: ${i}`)
This gives us the following compiled HTML:
<div class='wrap' style='--n: 16'>
  <div class='item' style='--i: 0'></div>
  <div class='item' style='--i: 1'></div>
  <!-- more such items -->
</div>
We set a few styles such that the items are laid out in a row and are square with a non-zero edge length:
$r: 2.5vw;

.wrap {
  display: flex;
  justify-content: space-evenly;
}

.item { padding: $r; }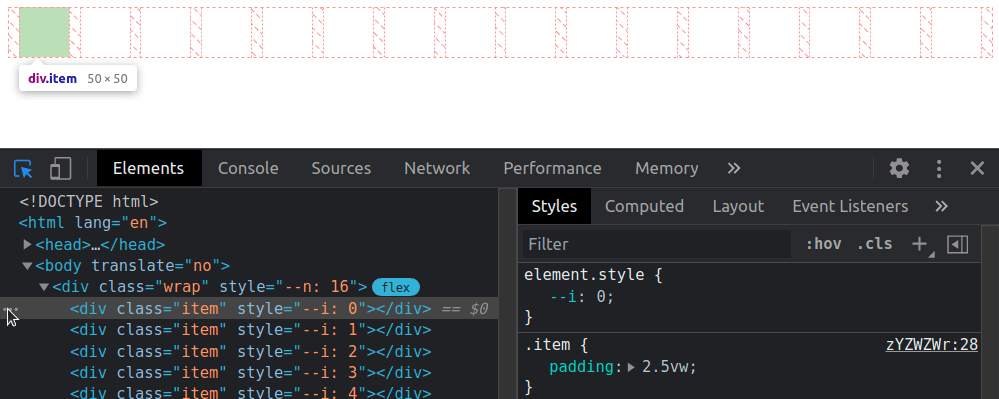
Now we add two sets of keyframes to animate a scaling transform and a box-shadow. The first set of keyframes, grow, makes our items scale up from nothing at 0% to full size at 50%, after which they stay at their full size until the end. The second set of keyframes, melt, shows us the items having inset box shadows that cover them fully up to the midway point in the animation (at 50%). That’s also when the items reach full size after growing from nothing. Then the spread radius of these inset shadows shrinks until it gets down to nothing at 100%.
$r: 2.5vw;

.item {
  padding: $r;
  animation: a $t infinite;
  animation-name: grow, melt;
}

@keyframes grow {
  0% { transform: scale(0); }
  50%, 100% { transform: none; }
}

@keyframes melt {
  0%, 50% { box-shadow: inset 0 0 0 $r; }
  100% { box-shadow: inset 0 0; }
}
Now comes the interesting part! We compute the middle between the index of the first item and that of the last one. This is the arithmetic mean of the two (since our indices are zero-based, the first and last are 0 and n - 1 respectively):
--m: calc(.5*(var(--n) - 1));We get the absolute value, --abs, of the difference between this middle, --m, and the item index, --i, then use it to compute the animation-delay:
--abs: max(var(--m) - var(--i), var(--i) - var(--m));
animation: a $t calc(var(--abs)/var(--m)*#{$t}) infinite backwards;
animation-name: grow, melt;
The absolute value ,--abs, of the difference between the middle, --m, and the item index, --i, can be as small as 0 (for the middle item, if --n is odd) and as big as --m (for the end items). This means dividing it by --m always gives us a value in the [0, 1] interval, which we then multiply with the animation duration $t to ensure every item has a delay between 0s and the animation-duration.
Note that we’ve also set animation-fill-mode to backwards. Since most items will start the animations later, this tells the browser to keep them with the styles in the 0% keyframes until then.
In this particular case, we wouldn’t see any difference without it either because, while the items would be at full size (not scaled to nothing like in the 0% keyframe of the grow animation), they would also have no box-shadow until they start animating. However, in a lot of other cases, it does make a difference and we shouldn’t forget about it.
Another possibility (one that doesn’t involve setting the animation-fill-mode) would be to ensure the animation-delay is always smaller or at most equal to 0 by subtracting a full animation-duration out of it.
--abs: max(var(--m) - var(--i), var(--i) - var(--m));
animation: a $t calc((var(--abs)/var(--m) - 1)*#{$t}) infinite;
animation-name: grow, melt;
Both options are valid, and which one you use depends on what you prefer to happen at the very beginning. I generally tend to go for negative delays because they make more sense when recording the looping animation to make a gif like the one below, which illustrates how the animation-delay values are symmetrical with respect to the middle.

For a visual comparison between the two options, you can rerun the following demo to see what happens at the very beginning.
A fancier example would be the following:
Here, each and every one of the --n navigation links and corresponding recipe articles have an index --idx. Whenever a navigation link is hovered or focused, its --idx value is read and set to the current index, --k, on the body. If none of these items is hovered or focused, --k gets set to a value outside the [0, n) interval (e.g. -1).
The absolute value, --abs, of the difference between --k and a link’s index, --idx, can tell us whether that’s the currently selected (hovered or focused) item. If this absolute value is 0, then our item is the currently selected one (i.e. --not-sel is 0 and --sel is 1). If this absolute value is bigger than 0, then our item is not the currently selected one (i.e. --not-sel is 1 and --sel is 0).
Given both --idx and --k are integers, it results that their difference is also an integer. This means the absolute value, --abs, of this difference is either 0 (when the item is selected), or bigger or equal to 1 (when the item is not selected).
When we put all of this into code, this is what we get:
--abs: Max(var(--k) - var(--idx), var(--idx) - var(--k));
--not-sel: Min(1, var(--abs));
--sel: calc(1 - var(--not-sel));
The --sel and --not-sel properties (which are always integers that always add up to 1) determine the size of the navigation links (the width in the wide screen scenario and the height in the narrow screen scenario), whether they’re greyscaled or not and whether or not their text content is hidden. This is something we won’t get into here, as it is outside the scope of this article and I’ve already explained in a lot of detail in a previous one.
What is relevant here is that, when a navigation link is clicked, it slides out of sight (up in the wide screen case, and left in the narrow screen case), followed by all the others around it, each with a transition-delay that depends on how far they are from the one that was clicked (that is, on the absolute value, --abs, of the difference between their index, --idx, and the index of the currently selected item, --k), revealing the corresponding recipe article. These transition-delay values are symmetrical with respect to the currently selected item.
transition: transform 1s calc(var(--abs)*.05s);The actual transition and delay are actually a bit more complex because more properties than just the transform get animated and, for transform in particular, there’s an additional delay when going back from the recipe article to the navigation links because we wait for the <article> element to disappear before we let the links slide down. But what were’re interested in is that component of the delay that makes the links is closer to the selected one start sliding out of sight before those further away. And that’s computed as above, using the --abs variable.
You can play with the interactive demo below.
Things get even more interesting in 2D, so let’s now make our row a grid!
We start by changing the structure a bit so that we have 8 columns and 8 rows (which means we have 8·8 = 64 items in total on the grid).
- let n = 8;
- let m = n*n;

style
  - for(let i = 0; i < n; i++)
    | .item:nth-child(#{n}n + #{i + 1}) { --i: #{i} }
    | .item:nth-child(n + #{n*i + 1}) { --j: #{i} }
.wrap(style=`--n: ${n}`)
  - for(let i = 0; i < m; i++)
    .item
The above Pug code compiles to the following HTML:
<style>
  .item:nth-child(8n + 1) { --i: 0 } /* items on 1st column */
  .item:nth-child(n + 1) { --j: 0 } /* items starting from 1st row */
  .item:nth-child(8n + 2) { --i: 1 } /* items on 2nd column */
  .item:nth-child(n + 9) { --j: 1 } /* items starting from 2nd row */
  /* 6 more such pairs */
</style>
<div class='wrap' style='--n: 8'>
  <div class='item'></div>
  <div class='item'></div>
  <!-- 62 more such items -->
</div>
Just like the previous case, we compute a middle index, --m, but since we’ve moved from 1D to 2D, we now have two differences in absolute value to compute, one for each of the two dimensions (one for the columns, --abs-i, and one for the rows, --abs-j).
--m: calc(.5*(var(--n) - 1));
--abs-i: max(var(--m) - var(--i), var(--i) - var(--m));
--abs-j: max(var(--m) - var(--j), var(--j) - var(--m));
We use the exact same two sets of @keyframes, but the animation-delay changes a bit, so it depends on both --abs-i and --abs-j. These absolute values can be as small as 0 (for tiles in the dead middle of the columns and rows) and as big as --m (for tiles at the ends of the columns and rows), meaning that the ratio between either of them and --m is always in the [0, 1] interval. This means the sum of these two ratios is always in the [0, 2] interval. If we want to reduce it to the [0, 1] interval, we need to divide it by 2 (or multiply by .5, same thing).
animation-delay: calc(.5*(var(--abs-i)/var(--m) + var(--abs-j)/var(--m))*#{$t});This gives us delays that are in the [0s, $t] interval. We can take the denominator, var(--m), out of the parenthesis to simplify the above formula a bit:
animation-delay: calc(.5*(var(--abs-i) + var(--abs-j))/var(--m)*#{$t});Just like the previous case, this makes grid items start animating later the further they are from the middle of the grid. We should use animation-fill-mode: backwards to ensure they stay in the state specified by the 0% keyframes until the delay time has elapsed and they start animating.
Alternatively, we can subtract one animation duration $t from all delays to make sure all grid items have already started their animation when the page loads.
animation-delay: calc((.5*(var(--abs-i) + var(--abs-j))/var(--m) - 1)*#{$t});This gives us the following result:
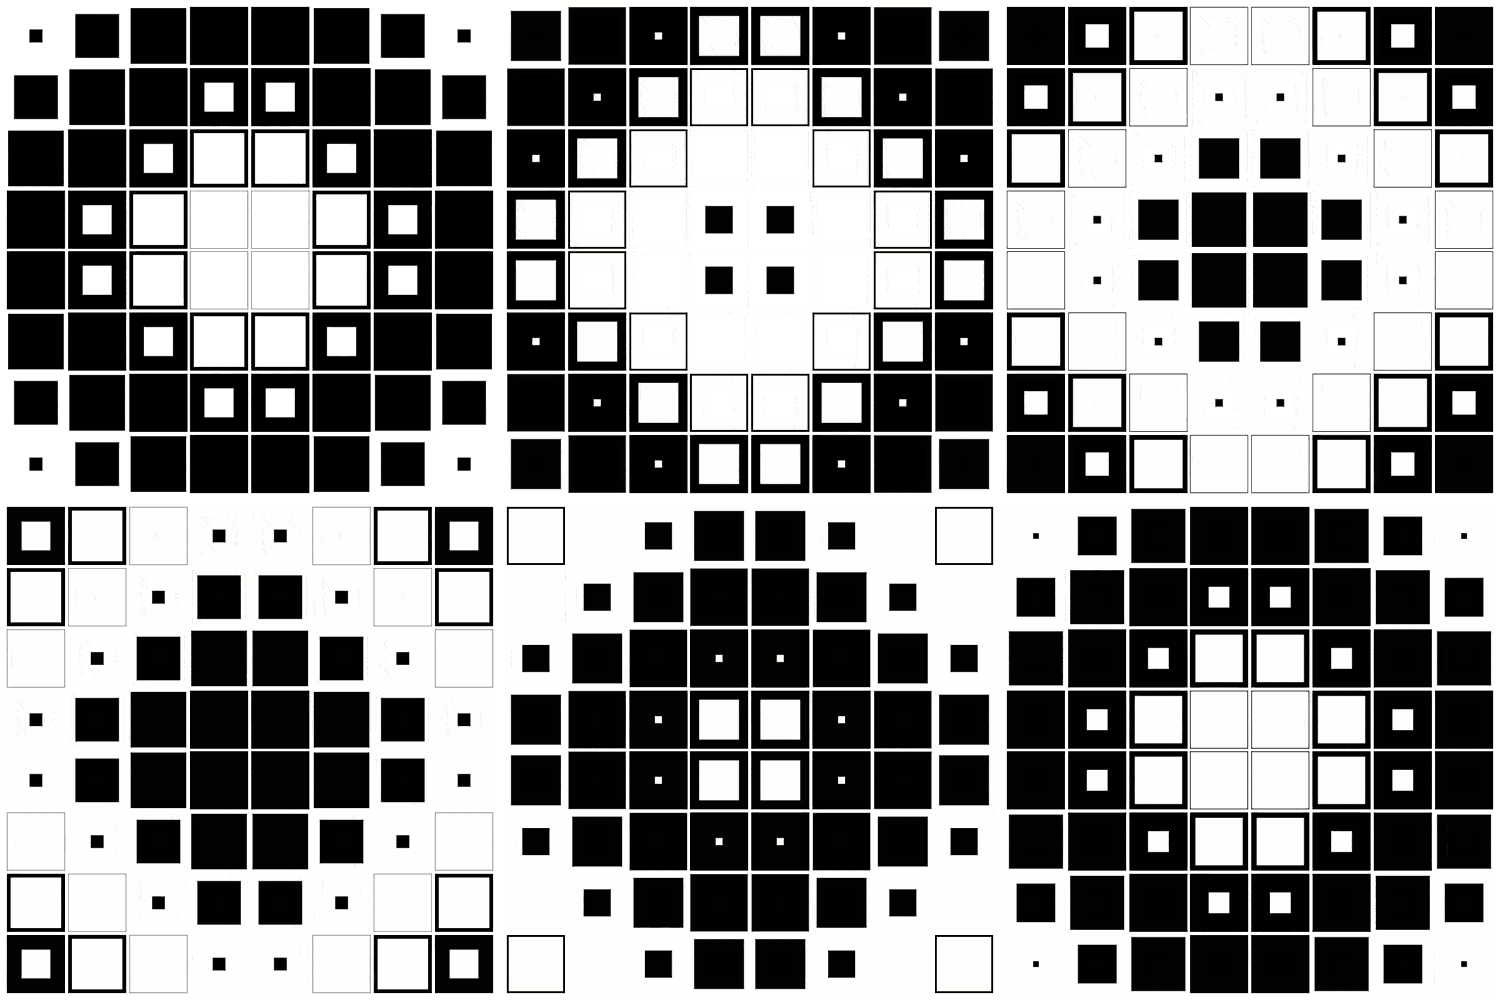
Let’s now see a few more interesting examples. We won’t be going into details about the “how” behind them as the symmetrical value technique works exactly the same as for the previous ones and the rest is outside the scope of this article. However, there is a link to a CodePen demo in the caption for each of the examples below, and most of these Pens also come with a recording that shows me coding them from scratch.
In the first example, each grid item is made up of two triangles that shrink down to nothing at opposite ends of the diagonal they meet along and then grow back to full size. Since this is an alternating animation, we let the delays to stretch across two iterations (a normal one and a reversed one), which means we don’t divide the sum of ratios in half anymore and we subtract 2 to ensure every item has a negative delay.
animation: s $t ease-in-out infinite alternate;
animation-delay: calc(((var(--abs-i) + var(--abs-j))/var(--m) - 2)*#{$t});In the second example, each grid item has a gradient at an angle that animates from 0deg to 1turn. This is possible via Houdini as explained in this article about the state of animating gradients with CSS.
The third example is very similar, except the animated angle is used by a conic-gradient instead of a linear one and also by the hue of the first stop.
In the fourth example, each grid cell contains seven rainbow dots that oscillate up and down. The oscillation delay has a component that depends on the cell indices in the exact same manner as the previous grids (the only thing that’s different here is the number of columns differs from the number of rows, so we need to compute two middle indices, one along each of the two dimensions) and a component that depends on the dot index, --idx, relative to the number of dots per cell, --n-dots.
--k: calc(var(--idx)/var(--n-dots));
--mi: calc(.5*(var(--n-cols) - 1));
--abs-i: max(var(--mi) - var(--i), var(--i) - var(--mi));
--mj: calc(.5*(var(--n-rows) - 1));
--abs-j: max(var(--mj) - var(--j), var(--j) - var(--mj));
animation-delay:
calc((var(--abs-i)/var(--mi) + var(--abs-j)/var(--mj) + var(--k) - 3)*#{$t});In the fifth example, the tiles making up the cube faces shrink and move inwards. The animation-delay for the top face is computed exactly as in our first 2D demo.
In the sixth example, we have a grid of columns oscillating up and down.
The animation-delay isn’t the only property we can set to have symmetrical values. We can also do this with the items’ dimensions. In the seventh example below, the tiles are distributed around half a dozen rings starting from the vertical (y) axis and are scaled using a factor that depends on how far they are from the top point of the rings. This is basically the 1D case with the axis curved on a circle.
The eighth example shows ten arms of baubles that wrap around a big sphere. The size of these baubles depends on how far they are from the poles, the closest ones being the smallest. This is done by computing the middle index, --m, for the dots on an arm and the absolute value, --abs, of the difference between it and the current bauble index, --j, then using the ratio between this absolute value and the middle index to get the sizing factor, --f, which we then use when setting the padding.
--m: calc(.5*(var(--n-dots) - 1));
--abs: max(var(--m) - var(--j), var(--j) - var(--m));
--f: calc(1.05 - var(--abs)/var(--m));
padding: calc(var(--f)*#{$r});Different styles for items before and after a certain (selected or middle) one
Let’s say we have a bunch of radio buttons and labels, with the labels having an index set as a custom property, --i. We want the labels before the selected item to have a green background, the label of the selected item to have a blue background and the rest of the labels to be grey. On the body, we set the index of the currently selected option as another custom property, --k.
- let n = 8;
- let k = Math.round((n - 1)*Math.random());

body(style=`--k: ${k}`)
  - for(let i = 0; i < n; i++)
    - let id = `r${i}`;
    input(type='radio' name='r' id=id checked=i===k)
    label(for=id style=`--i: ${i}`) Option ##{i}
This compiles to the following HTML:
<body style='--k: 1'>
  <input type='radio' name='r' id='r0'/>
  <label for='r0' style='--i: 0'>Option #0</label>
  <input type='radio' name='r' id='r1' checked='checked'/>
  <label for='r1' style='--i: 1'>Option #1</label>
  <input type='radio' name='r' id='r2'/>
  <label for='r2' style='--i: 2'>Option #2</label>
  <!-- more options -->
</body>
We set a few layout and prettifying styles, including a gradient background on the labels that creates three vertical stripes, each occupying a third of the background-size (which, for now, is just the default 100%, the full element width):
$c: #6daa7e, #335f7c, #6a6d6b;

body {
  display: grid;
  grid-gap: .25em 0;
  grid-template-columns: repeat(2, max-content);
  align-items: center;
  font: 1.25em/ 1.5 ubuntu, trebuchet ms, sans-serif;
}

label {
  padding: 0 .25em;
  background:
    linear-gradient(90deg,
      nth($c, 1) 33.333%,
      nth($c, 2) 0 66.667%,
      nth($c, 3) 0);
  color: #fff;
  cursor: pointer;
}
From the JavaScript, we update the value of --k whenever we select a different option:
addEventListener('change', e => {
  let _t = e.target;

  document.body.style.setProperty('--k', +_t.id.replace('r', ''))
})
Now comes the interesting part! For our label elements, we compute the sign, --sgn, of the difference between the label index, --i, and the index of the currently selected option, --k. We then use this --sgn value to compute the background-position when the background-size is set to 300% — that is, three times the label’s width because we may have of three possible backgrounds: one for the case when the label is for an option before the selected one, a second for the case when the label is for the selected option, and a third for the case when the label is for an option after the selected one.
--sgn: clamp(-1, var(--i) - var(--k), 1);
background:
  linear-gradient(90deg,
      nth($c, 1) 33.333%,
      nth($c, 2) 0 66.667%,
      nth($c, 3) 0)
    calc(50%*(1 + var(--sgn)))/ 300%
If --i is smaller than --k (the case of a label for an option before the selected one), then --sgn is -1 and the background-position computes to 50%*(1 + -1) = 50%*0 = 0%, meaning we only see the first vertical stripe (the green one).
If --i is equal --k (the case of the label for the selected option), then --sgn is 0 and the background-position computes to 50%*(1 + 0) = 50%*1 = 50%, so we only see the vertical stripe in the middle (the blue one).
If --i is greater than --k (the case of a label for an option after the selected one), then --sgn is 1 and the background-position computes to 50%*(1 + 1) = 50%*2 = 100%, meaning we only see the last vertical stripe (the grey one).
A more aesthetically appealing example would be the following navigation where the vertical bar is on the side closest to the selected option and, for the selected one, it spreads across the entire element.
This uses a structure that’s similar to that of the previous demo, with radio inputs and labels for the navigation items. The moving “background” is actually an ::after pseudo-element whose translation value depends on the sign, --sgn. The text is a ::before pseudo-element whose position is supposed to be in the middle of the white area, so its translation value also depends on --sgn.
/* relevant styles */
label {
  --sgn: clamp(-1, var(--k) - var(--i), 1);

  &::before {
    transform: translate(calc(var(--sgn)*-.5*#{$pad}))
  }
  &::after {
    transform: translate(calc(var(--sgn)*(100% - #{$pad})))
  }
}
Let’s now quickly look at a few more demos where computing the sign (and maybe the absolute value as well) comes in handy.
First up, we have a square grid of cells with a radial-gradient whose radius shrinks from covering the entire cell to nothing. This animation has a delay computed as explained in the previous section. What’s new here is that the coordinates of the radial-gradient circle depend on where the cell is positioned with respect to the middle of the grid — that is, on the signs of the differences between the column --i and row --j indices and the middle index, --m.
/* relevant CSS */
$t: 2s;

@property --p {
  syntax: '<length-percentage>';
  initial-value: -1px;
  inherits: false;
}

.cell {
  --m: calc(.5*(var(--n) - 1));
  --dif-i: calc(var(--m) - var(--i));
  --abs-i: max(var(--dif-i), -1*var(--dif-i));
  --sgn-i: clamp(-1, var(--dif-i)/.5, 1);
  --dif-j: calc(var(--m) - var(--j));
  --abs-j: max(var(--dif-j), -1*var(--dif-j));
  --sgn-j: clamp(-1, var(--dif-j)/.5, 1);
  background:
    radial-gradient(circle
      at calc(50% + 50%*var(--sgn-i)) calc(50% + 50%*var(--sgn-j)),
      currentcolor var(--p), transparent calc(var(--p) + 1px))
      nth($c, 2);
  animation-delay:
    calc((.5*(var(--abs-i) + var(--abs-j))/var(--m) - 1)*#{$t});
}

@keyframes p { 0% { --p: 100%; } }Then we have a double spiral of tiny spheres where both the sphere diameter --d and the radial distance --x that contributes to determining the sphere position depend on the absolute value --abs of the difference between each one’s index, --i, and the middle index, --m. The sign, --sgn, of this difference is used to determine the spiral rotation direction. This depends on where each sphere is with respect to the middle – that is, whether its index ,--i, is smaller or bigger than the middle index, --m.
/* relevant styles */
--m: calc(.5*(var(--p) - 1));
--abs: max(calc(var(--m) - var(--i)), calc(var(--i) - var(--m)));
--sgn: clamp(-1, var(--i) - var(--m), 1);
--d: calc(3px + var(--abs)/var(--p)*#{$d}); /* sphere diameter */
--a: calc(var(--k)*1turn/var(--n-dot)); /* angle used to determine sphere position */
--x: calc(var(--abs)*2*#{$d}/var(--n-dot)); /* how far from spiral axis */
--z: calc((var(--i) - var(--m))*2*#{$d}/var(--n-dot)); /* position with respect to screen plane */
width: var(--d); height: var(--d);
transform:
  /* change rotation direction by changing x axis direction */
  scalex(var(--sgn))
  rotate(var(--a))
  translate3d(var(--x), 0, var(--z))
  /* reverse rotation so the sphere is always seen from the front */
  rotate(calc(-1*var(--a)));
  /* reverse scaling so lighting on sphere looks consistent */
scalex(var(--sgn))Finally, we have a grid of non-square boxes with a border. These boxes have a mask created using a conic-gradient with an animated start angle, --ang. Whether these boxes are flipped horizontally or vertically depends on where they are with respect to the middle – that is, on the signs of the differences between the column --i and row --j indices and the middle index, --m. The animation-delay depends on the absolute values of these differences and is computed as explained in the previous section. We also have a gooey filter for a nicer “wormy” look, but we won’t be going into that here.
/* relevant CSS */
$t: 1s;

@property --ang {
  syntax: '<angle>';
  initial-value: 0deg;
  inherits: false;
}

.box {
  --m: calc(.5*(var(--n) - 1));
  --dif-i: calc(var(--i) - var(--m));
  --dif-j: calc(var(--j) - var(--m));
  --abs-i: max(var(--dif-i), -1*var(--dif-i));
  --abs-j: max(var(--dif-j), -1*var(--dif-j));
  --sgn-i: clamp(-1, 2*var(--dif-i), 1);
  --sgn-j: clamp(-1, 2*var(--dif-j), 1);
  transform: scale(var(--sgn-i), var(--sgn-j));
  mask:
    repeating-conic-gradient(from var(--ang, 0deg),
        red 0% 12.5%, transparent 0% 50%);
  animation: ang $t ease-in-out infinite;
  animation-delay:
    calc(((var(--abs-i) + var(--abs-j))/var(--n) - 1)*#{$t});
}

@keyframes ang { to { --ang: .5turn; } }Time (and not only) formatting
Let’s say we have an element for which we store a number of seconds in a custom property, --val, and we want to display this in a mm:ss format, for example.
We use the floor of the ratio between --val and 60 (the number of seconds in a minute) to get the number of minutes and modulo for the number of seconds past that number of minutes. Then we use a clever little counter trick to display the formatted time in a pseudo-element.
@property --min {
  syntax: '<integer>';
  initial-value: 0;
  inherits: false;
}

code {
  --min: calc(var(--val)/60 - .5);
  --sec: calc(var(--val) - var(--min)*60);
  counter-reset: min var(--min) sec var(--sec);

  &::after {
    /* so we get the time formatted as 02:09 */
    content:
      counter(min, decimal-leading-zero) ':'
      counter(sec, decimal-leading-zero);
  }
}
This works in most situations, but we encounter a problem when --val is exactly 0. In this case, 0/60 is 0 and then subtracting .5, we get -.5, which gets rounded to what’s the bigger adjacent integer in absolute value. That is, -1, not 0! This means our result will end up being -01:60, not 00:00!
Fortunately, we have a simple fix and that’s to slightly alter the formula for getting the number of minutes, --min:
--min: max(0, var(--val)/60 - .5);There are other formatting options too, as illustrated below:
/* shows time formatted as 2:09 */
content: counter(min) ':' counter(sec, decimal-leading-zero);

/* shows time formatted as 2m9s */
content: counter(min) 'm' counter(sec) 's';
We can also apply the same technique to format the time as hh:mm:ss (live test).
@property --hrs {
  syntax: '<integer>';
  initial-value: 0;
  inherits: false;
}

@property --min {
  syntax: '<integer>';
  initial-value: 0;
  inherits: false;
}

code {
  --hrs: max(0, var(--val)/3600 - .5);
  --mod: calc(var(--val) - var(--hrs)*3600);
  --min: max(0, var(--mod)/60 - .5);
  --sec: calc(var(--mod) - var(--min)*60);
  counter-reset: hrs var(--hrs) var(--min) sec var(--sec);

  &::after {
    /* so we get the time formatted as 00:02:09 */
    content:
      counter(hrs, decimal-leading-zero) ':'
      counter(min, decimal-leading-zero) ':'
      counter(sec, decimal-leading-zero);
  }
}
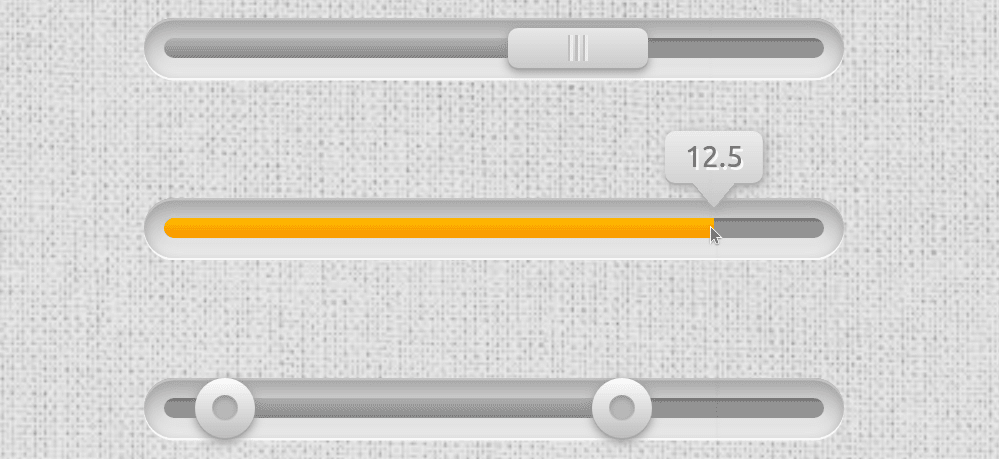
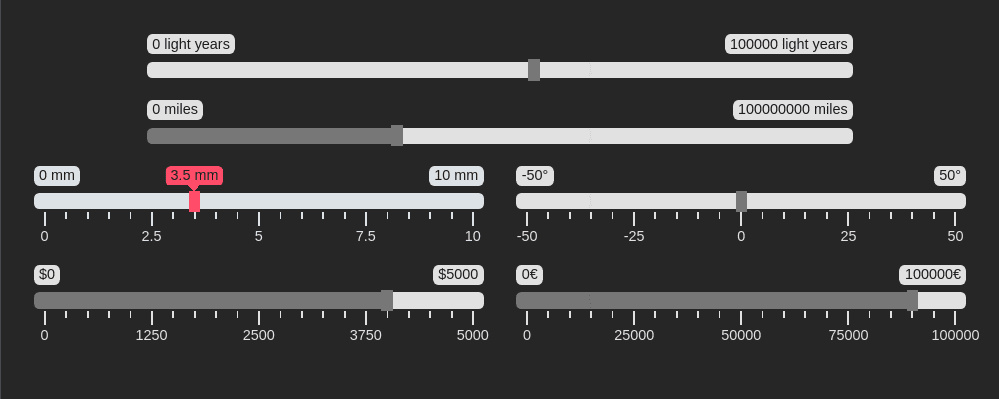
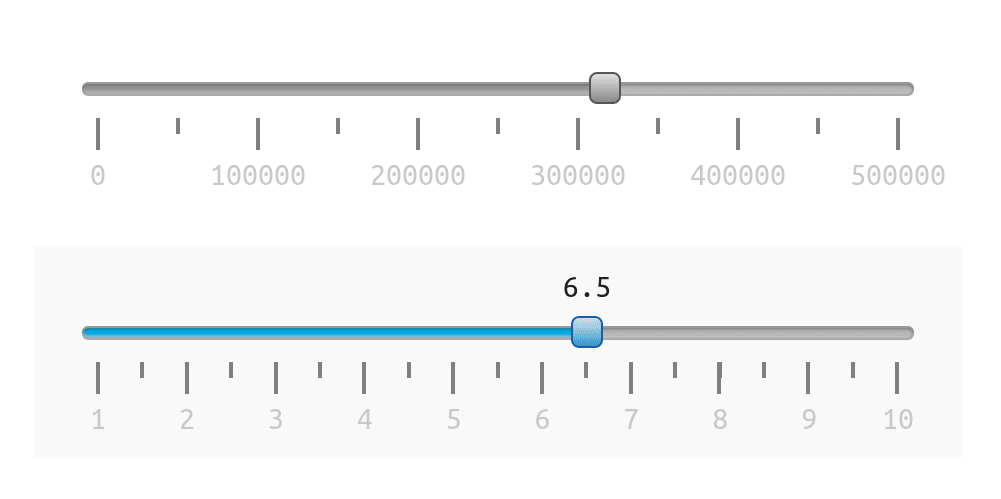
This is a technique I’ve used for styling the output of native range sliders such as the one below.

Time isn’t the only thing we can use this for. Counter values have to be integer values, which means the modulo trick also comes in handy for displaying decimals, as in the second slider seen below.
A couple more such examples:
Even more use cases
Let’s say we have a volume slider with an icon at each end. Depending on the direction we move the slider’s thumb in, one of the two icons gets highlighted. This is possible by getting the absolute value, --abs, of the difference between each icon’s sign, --sgn-ico (-1 for the one before the slider, and 1 for the one after the slider), and the sign of the difference, --sgn-dir, between the slider’s current value, --val, and its previous value, --prv. If this is 0, then we’re moving in the direction of the current icon so we set its opacity to 1. Otherwise, we’re moving away from the current icon, so we keep its opacity at .15.
This means that, whenever the range input’s value changes, not only do we need to update its current value, --val, on its parent, but we need to update its previous value, which is another custom property, --prv, on the same parent wrapper:
addEventListener('input', e => {
  let _t = e.target, _p = _t.parentNode;

  _p.style.setProperty('--prv', +_p.style.getPropertyValue('--val'))
  _p.style.setProperty('--val', +_t.value)
})
The sign of their difference is the sign of the direction, --sgn-dir, we’re going in and the current icon is highlighted if its sign, --sgn-ico, and the sign of the direction we’re going in, --sgn-dir, coincide. That is, if the absolute value, --abs, of their difference is 0 and, at the same time, the parent wrapper is selected (it’s either being hovered or the range input in it has focus).
[role='group'] {
  --dir: calc(var(--val) - var(--prv));
  --sgn-dir: clamp(-1, var(--dir), 1);
  --sel: 0; /* is the slider focused or hovered? Yes 1/ No 0 */

  &:hover, &:focus-within { --sel: 1; }
}

.ico {
  --abs: max(var(--sgn-dir) - var(--sgn-ico), var(--sgn-ico) - var(--sgn-dir));
  --hlg: calc(var(--sel)*(1 - min(1, var(--abs)))); /* highlight current icon? Yes 1/ No 0 */
  opacity: calc(1 - .85*(1 - var(--hlg)));
}
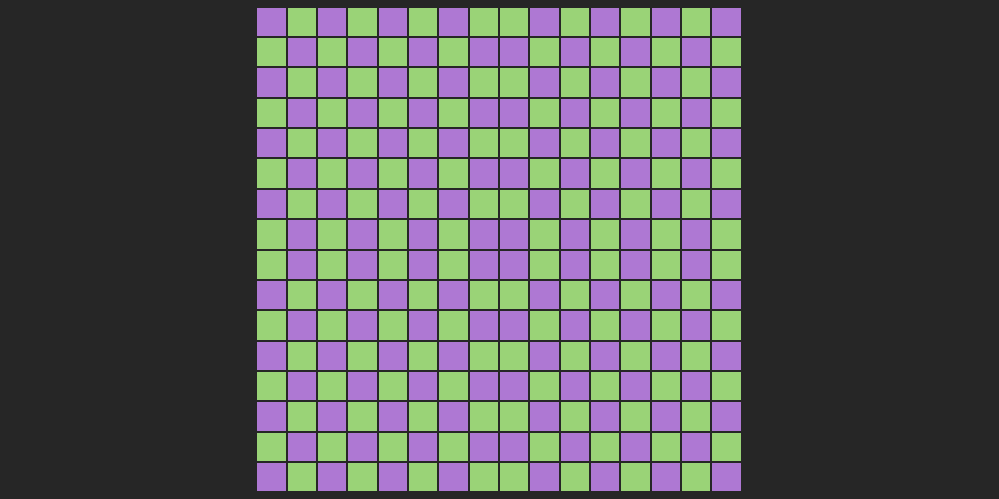
Another use case is making property values of items on a grid depend on the parity of the sum of horizontal --abs-i and vertical --abs-j distances from the middle, --m. For example, let’s say we do this for the background-color:
@property --floor {
  syntax: '<integer>';
  initial-value: 0;
  inherits: false;
}

.cell {
  --m: calc(.5*(var(--n) - 1));
  --abs-i: max(var(--m) - var(--i), var(--i) - var(--m));
  --abs-j: max(var(--m) - var(--j), var(--j) - var(--m));
  --sum: calc(var(--abs-i) + var(--abs-j));
  --floor: max(0, var(--sum)/2 - .5);
  --mod: calc(var(--sum) - var(--floor)*2);
  background: hsl(calc(90 + var(--mod)*180), 50%, 65%);
}
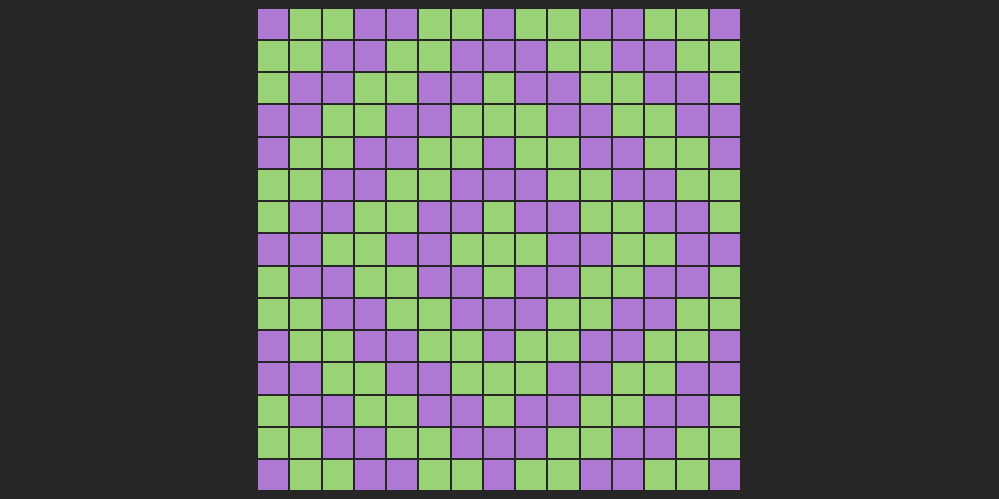
We can spice things up by using the modulo 2 of the floor of the sum divided by 2:
@property --floor {
  syntax: '<integer>';
  initial-value: 0;
  inherits: false;
}

@property --int {
  syntax: '<integer>';
  initial-value: 0;
  inherits: false;
}

.cell {
  --m: calc(.5*(var(--n) - 1));
  --abs-i: max(var(--m) - var(--i), var(--i) - var(--m));
  --abs-j: max(var(--m) - var(--j), var(--j) - var(--m));
  --sum: calc(var(--abs-i) + var(--abs-j));
  --floor: max(0, var(--sum)/2 - .5);
  --int: max(0, var(--floor)/2 - .5);
  --mod: calc(var(--floor) - var(--int)*2);
  background: hsl(calc(90 + var(--mod)*180), 50%, 65%);
}
We could also make both the direction of a rotation and that of a conic-gradient() depend on the same parity of the sum, --sum, of horizontal --abs-i and vertical --abs-j distances from the middle, --m. This is achieved by horizontally flipping the element if the sum, --sum, is even. In the example below, the rotation and size are also animated via Houdini (they both depend on a custom property, --f, which we register and then animate from 0 to 1), and so are the worm hue, --hue, and the conic-gradient() mask, both animations having a delay computed exactly as in previous examples.
@property --floor {
  syntax: '<integer>';
  initial-value: 0;
  inherits: false;
}

.🐛 {
  --m: calc(.5*(var(--n) - 1));
  --abs-i: max(var(--m) - var(--i), var(--i) - var(--m));
  --abs-j: max(var(--m) - var(--j), var(--j) - var(--m));
  --sum: calc(var(--abs-i) + var(--abs-j));
  --floor: calc(var(--sum)/2 - .5);
  --mod: calc(var(--sum) - var(--floor)*2);
  --sgn: calc(2*var(--mod) - 1); /* -1 if --mod is 0; 1 id --mod is 1 */
  transform:
    scalex(var(--sgn))
    scale(var(--f))
    rotate(calc(var(--f)*180deg));
  --hue: calc(var(--sgn)*var(--f)*360);
}Finally, another big use case for the techniques explained so far is shading not just convex, but also concave animated 3D shapes using absolutely no JavaScript! This is one topic that’s absolutely massive on its own and explaining everything would take an article as long as this one, so I won’t be going into it at all here. But I have made a few videos where I code a couple of such basic pure CSS 3D shapes (including a wooden star and a differently shaped metallic one) from scratch and you can, of course, also check out the CSS for the following example on CodePen.
Wow this is pretty amazing, this is how we should teach math in school :)
Thanks, I really enjoy this type of stuff.
On a related note, does anyone happen to know why CSS incorrectly refers to Power functions as Exponential functions? f(x)=exp(x) is all good, but the rest, such as sqrt(x), etc. are not exponential functions at all.
I’m curious as to the reason for this deviation from mathematical definition.
What browsers is that round function available in?
https://caniuse.com/mdn-css_at-rules_property
MDN doesn’t even seem to know what @property is
Doesn’t look too good now. Maybe it’s quicker and safer to wait for the real CSS round function?
And then, do I need to define such an @property for each variable that I want to assign a rounded value? The name “–round” suggests that this is a reusable function of some kind. I didn’t quite get my head around CSS variables yet.
My library defines (and lets the user overwrite) variables for font sizes, and I want the line heights to be rounded to full pixels to avoid interpolation errors and uneven line heights on real screens. For now, I’ll have to set these line heights explicitly.
I can’t seem to make rounding work. As I understand it, registering a variable as an integer, should force a value with decimals to an integer. What don’t I get?
Drop the leading hyphens when declaring the propery.
@property round {
I’ve no ideas but changing it to
make
--roundround up to 401